This is the multi-page printable view of this section. Click here to print.
Integration
1 - Open WebUI
Open WebUI provides a web UI that works with OpenAI-compatible APIs. You can run Openn WebUI locally or run in a Kubernetes cluster.
Here is an instruction for running Open WebUI in a Kubernetes cluster.
OPENAI_API_KEY=<LLMariner API key>
OPEN_API_BASE_URL=<LLMariner API endpoint>

kubectl create namespace open-webui
kubectl create secret generic -n open-webui llmariner-api-key --from-literal=key=${OPENAI_API_KEY}

kubectl apply -f - <<EOF
apiVersion: apps/v1
kind: Deployment
metadata:
  name: open-webui
  namespace: open-webui
spec:
  selector:
    matchLabels:
      name: open-webui
  template:
    metadata:
      labels:
        name: open-webui
    spec:
      containers:
      - name: open-webui
        image: ghcr.io/open-webui/open-webui:main
        ports:
        - name: http
          containerPort: 8080
          protocol: TCP
        env:
        - name: OPENAI_API_BASE_URLS
          value: ${OPEN_API_BASE_URL}
        - name: WEBUI_AUTH
          value: "false"
        - name: OPENAI_API_KEYS
          valueFrom:
            secretKeyRef:
              name: llmariner-api-key
              key: key
---
apiVersion: v1
kind: Service
metadata:
  name: open-webui
  namespace: open-webui
spec:
  type: ClusterIP
  selector:
    name: open-webui
  ports:
  - port: 8080
    name: http
    targetPort: http
    protocol: TCP
EOF
You can then access Open WebUI with port forwarding:
kubectl port-forward -n open-webui service/open-webui 8080
2 - Continue
Continue provides an open source AI code assistant. You can use LLMariner as a backend endpoint for Continue.
As LLMariner provides the OpenAI compatible API, you can set the provider to "openai". apiKey is set to an API key generated by LLMariner, and apiBase is set to the endpoint URL of LLMariner (e.g., http://localhost:8080/v1).
Here is an example configuration that you can put at ~/.continue/config.json.
{
  "models": [
    {
      "title": "Meta-Llama-3.1-8B-Instruct-q4",
      "provider": "openai",
      "model": "meta-llama-Meta-Llama-3.1-8B-Instruct-q4",
      "apiKey": "<LLMariner API key>",
      "apiBase": "<LLMariner endpoint>"
    }
  ],
  "tabAutocompleteModel": {
    "title": "Auto complete",
    "provider": "openai",
    "model": "deepseek-ai-deepseek-coder-6.7b-base-q4",
    "apiKey": "<LLMariner API key>",
    "apiBase": "<LLMariner endpoint>",
    "completionOptions": {
      "presencePenalty": 1.1,
      "frequencyPenalty": 1.1
    },
  },
  "allowAnonymousTelemetry": false
}
The following is a demo video that shows the Continue integration that enables the coding assistant with Llama-3.1-Nemotron-70B-Instruct.
3 - Aider
Aider is AI pair programming in your terminal or browser.
Aider supports the OpenAI compatible API, and you can configure the endpoint and the API key with environment variables.
Here is an example installation and configuration procedure.
python -m pip install -U aider-chat

export OPENAI_API_BASE=<Base URL (e.g., http://localhost:8080/v1)>
export OPENAI_API_KEY=<API key>
You can then run Aider in your terminal or browser. Here is an example command that launches Aider in your browser with Llama 3.1 70B.
<Move to your github repo directory>

aider --model openai/meta-llama-Meta-Llama-3.1-70B-Instruct-awq --browser
Please note that the model name requires the openai/ prefix.
https://aider.chat/examples/README.html has example chat transcripts for building applications (e.g., “make a flask app with a /hello endpoint that returns hello world”).
4 - AI Shell
AI Shell is an open source tool that converts natural language to shell commands.
npm install -g @builder.io/ai-shell
ai config set OPENAI_API_ENDPOINT=<Base URL (e.g., http://localhost:8080/v1)>
ai config set OPENAI_KEY=<API key>
ai config set MODEL=<model name>
Then you can run the ai command and ask what you want in plain English and generate a shell command with a human readable explanation of it.
ai what is my ip address
5 - k8sgpt
k8sgpt is a tool for scanning your Kubernetes clusters, diagnosing, and triaging issues in simple English.
You can use LLMariner as a backend of k8sgpt by running the following command:
k8sgpt auth add \
  --backend openai \
  --baseurl <LLMariner base URL (e.g., http://localhost:8080/v1/) \
  --password <LLMariner API Key> \
  --model <Model ID>
Then you can a command like k8sgpt analyze to inspect your Kubernetes cluster.
k8sgpt analyze --explain
6 - Dify
Dify is is an open-source LLM app development platform. It can orchestrate LLM apps from agents to complex AI workflows, with an RAG engine.
You can add LLMariner as one of Dify’s model providers with the following steps:
- Click the user profile icon.
- Click “Settings”
- Click “Model Provider”
- Search “OpenAI-API-compatible” and click “Add model”
- Configure a model name, API key,a nd API endpoint URL.
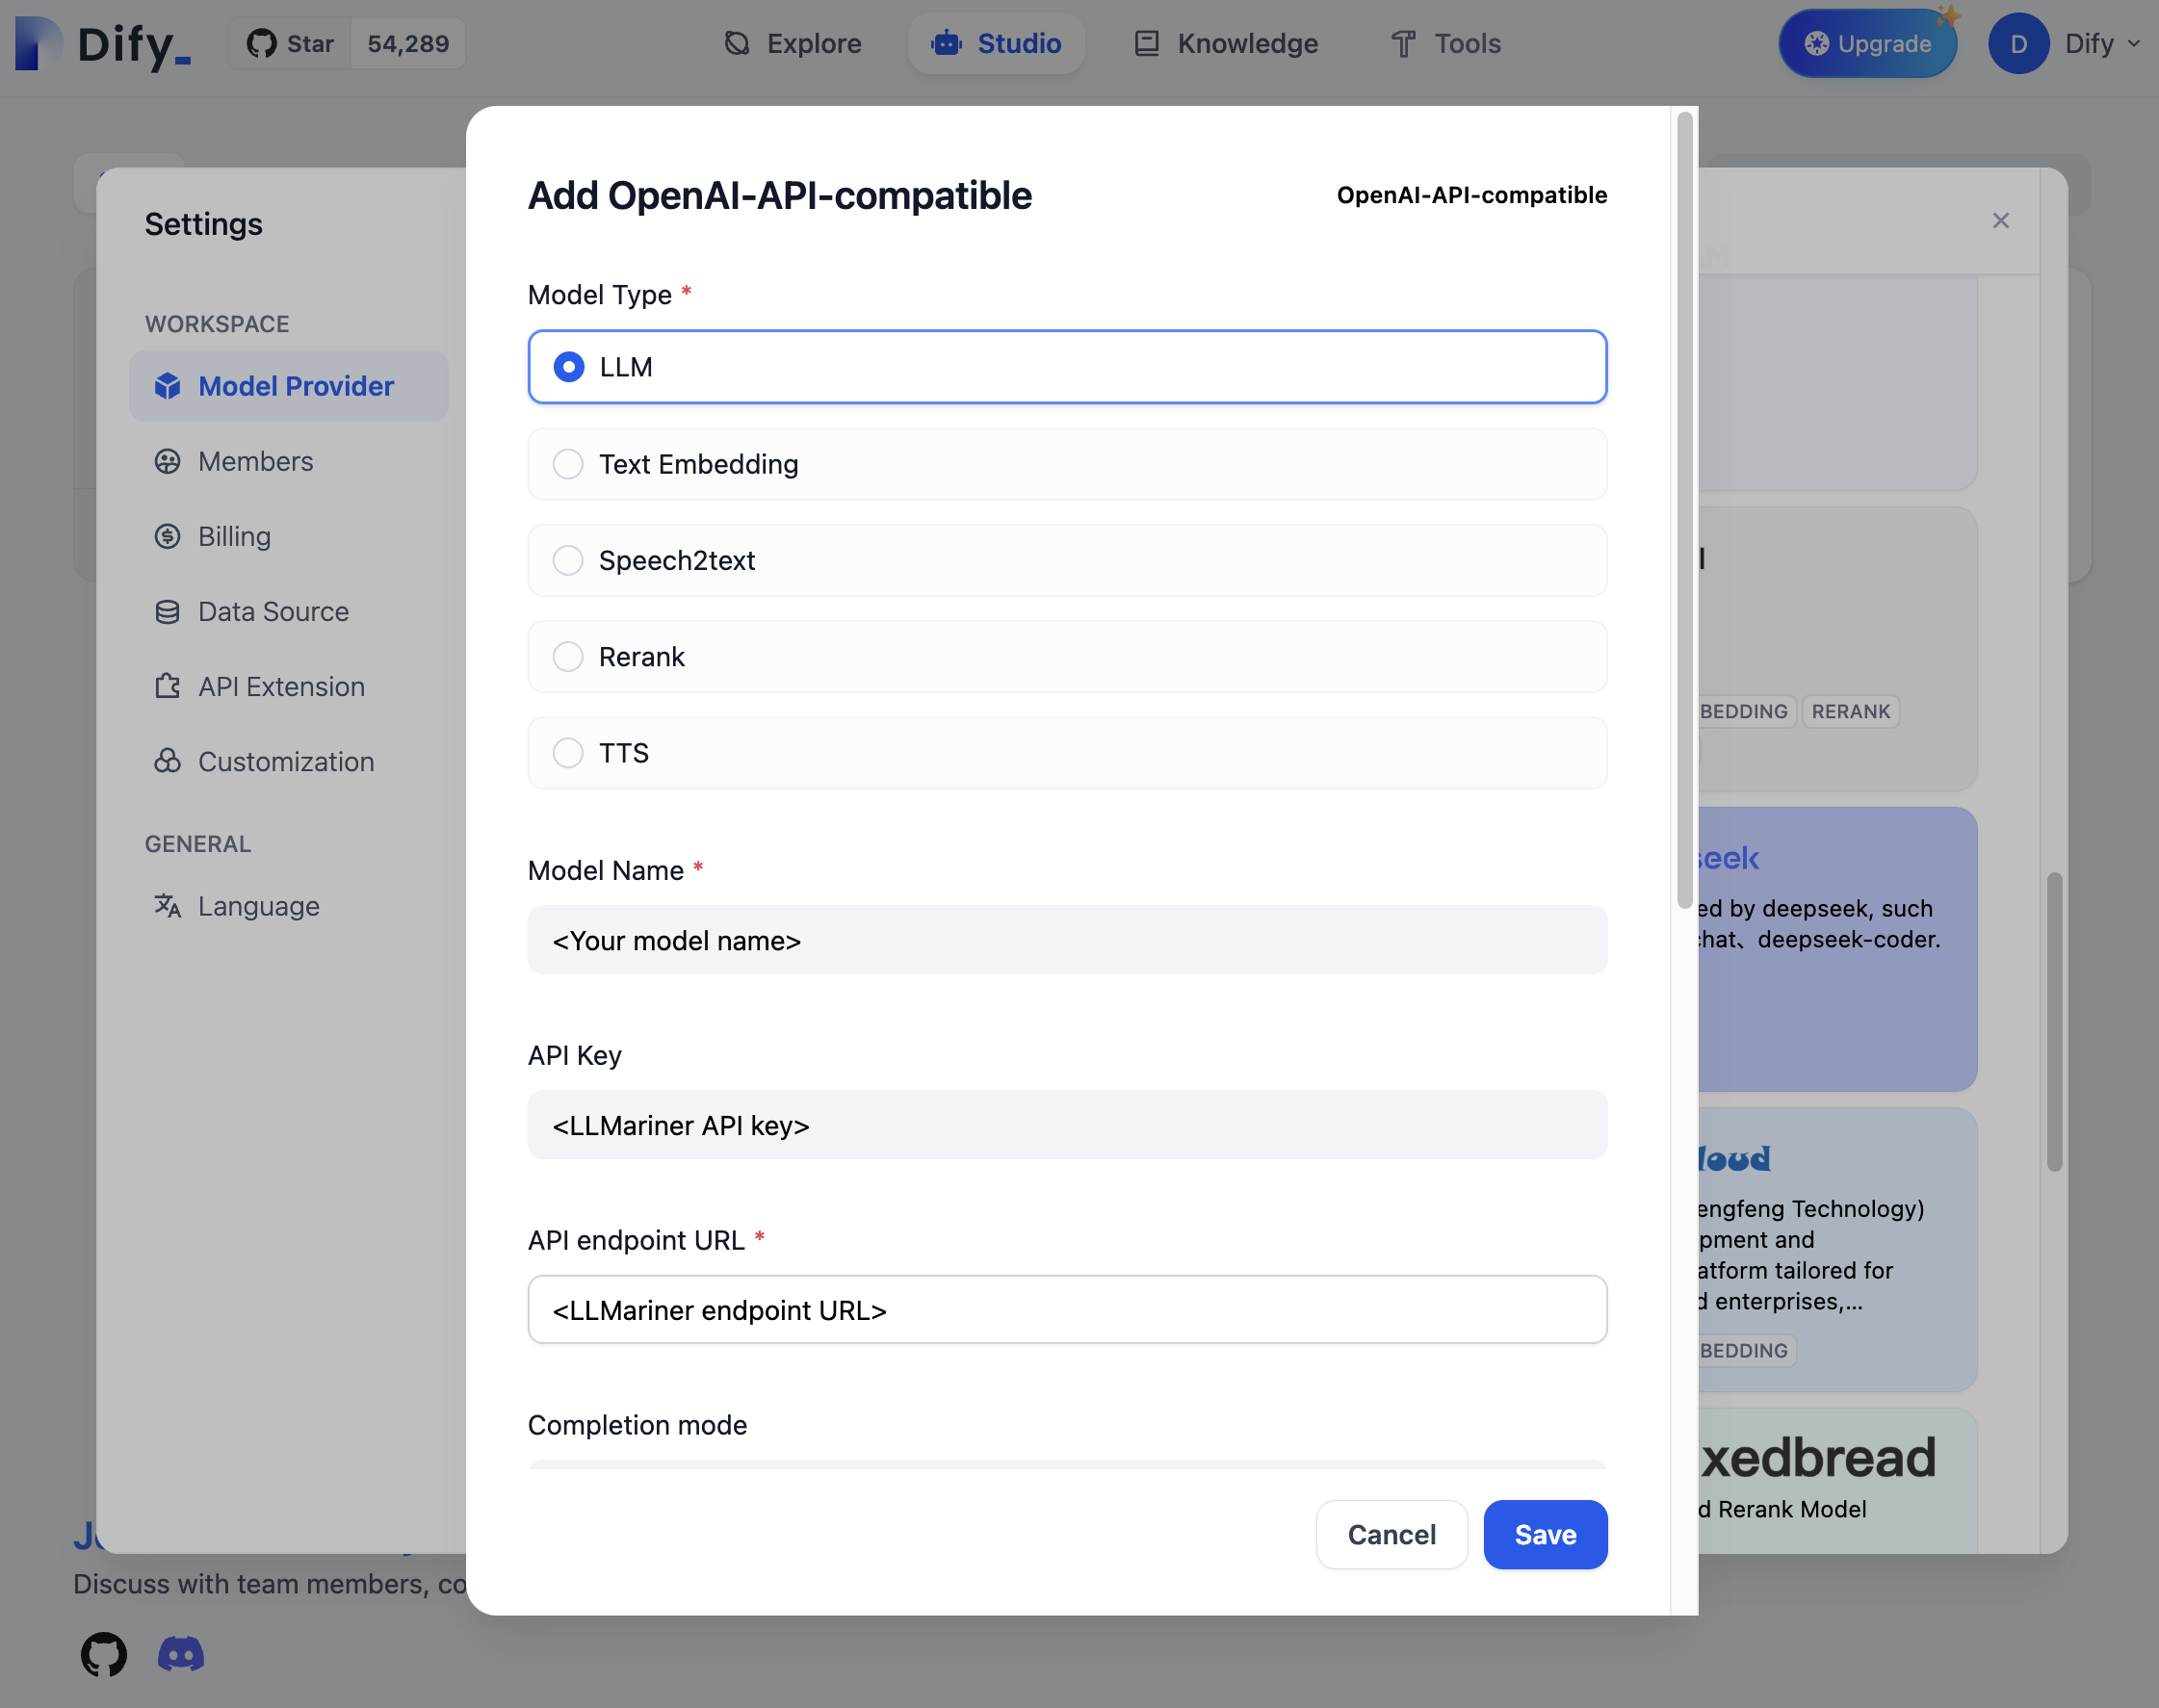
You can then use the registered model from your LLM applications. For example, you can create a new application by “Create from Template” and replace the use of an OpenAI model with the configured model.
If you want to deploy Dify in your Kubernetes clusters, follow README.md in the Dify GitHub repository.
7 - n8n
n8n is a no-code platform for workload automation. You can deploy n8n to your Kubernetes clusters. Here is an example command:
kubectl apply -f - <<EOF
apiVersion: apps/v1
kind: Deployment
metadata:
  name: n8n
  namespace: n8n
spec:
  selector:
    matchLabels:
      name: n8n
  template:
    metadata:
      labels:
        name: n8n
    spec:
      containers:
      - name: n8n
        image: docker.n8n.io/n8nio/n8n
        ports:
        - name: http
          containerPort: 5678
          protocol: TCP
---
apiVersion: v1
kind: Service
metadata:
  name: n8n
  namespace: n8n
spec:
  type: ClusterIP
  selector:
    name: n8n
  ports:
  - port: 5678
    name: http
    targetPort: http
    protocol: TCP
EOF
You can then access n8n with port forwarding:
kubectl port-forward -n n8n service/n8n 5678
You can create an “OpenAI Model” node and configure its base URL and credential to hit LLMariner.
If you are using vLLM as a inference runtime, you will need to enable tool calling. Please see Tool calling for details.
8 - Slackbot
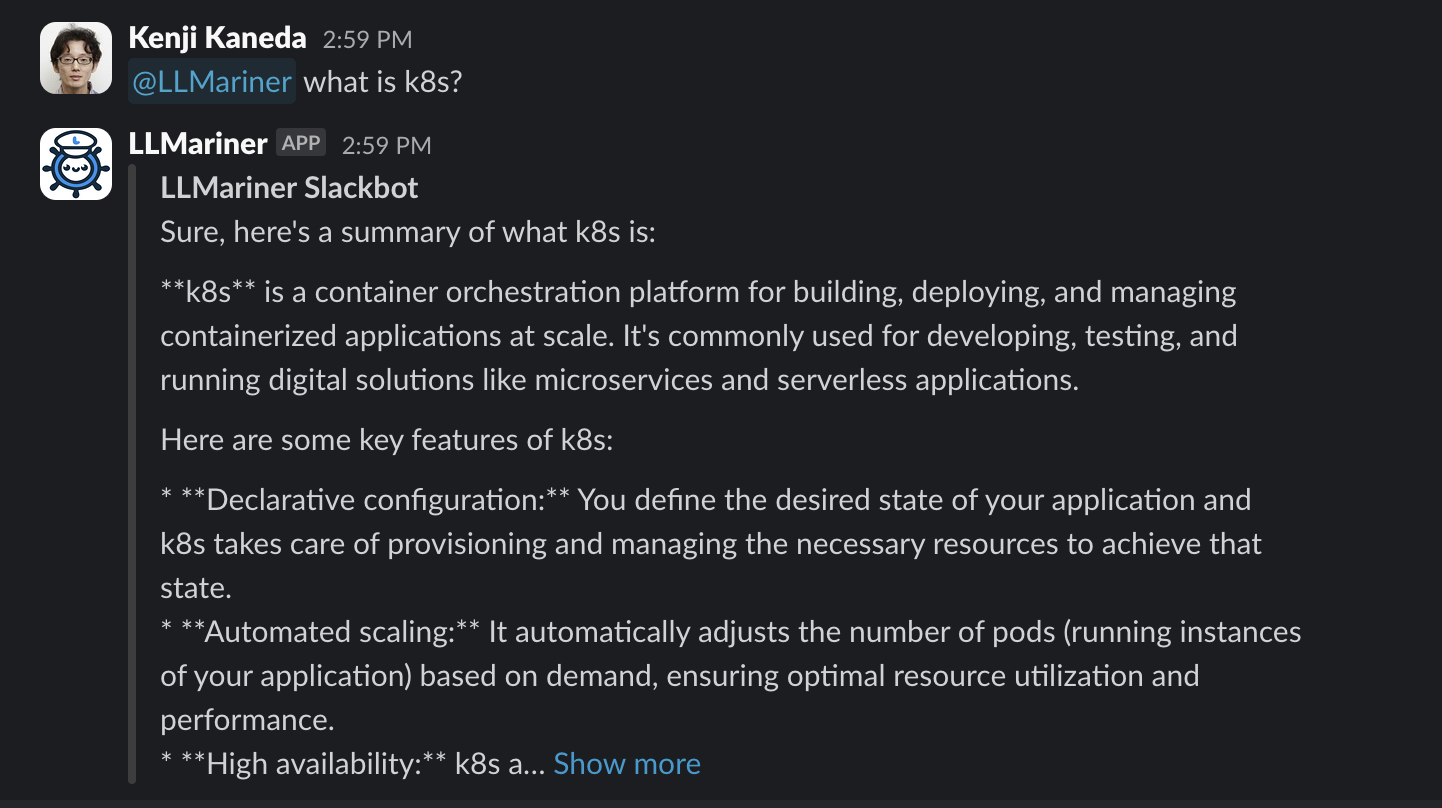
You can build a Slackbot that is integrated with LLMariner. The bot can provide a chat UI with Slack and answer questions from end users.
An example implementation can be found in https://github.com/llmariner/slackbot. You can deploy it in your Kubernetes clusters and build a Slack app with the following configuration:
- Create an app-level token whose scope is
connections:write. - Enable the socket mode. Enable event subscription with the
app_mentions:readscope. - Add the following scopes in “OAuth & Permissions”:
app_mentions:read,chat:write,chat:write.customize, andlinks:write
You can install the Slack application to your workspace and interact.
9 - MLflow
MLflow is an open-source tool for managing the machine learning lifecycle. It has various features for LLMs (link) and integration with OpenAI. We can apply these MLflow features to the LLM endpoints provided by LLMariner.
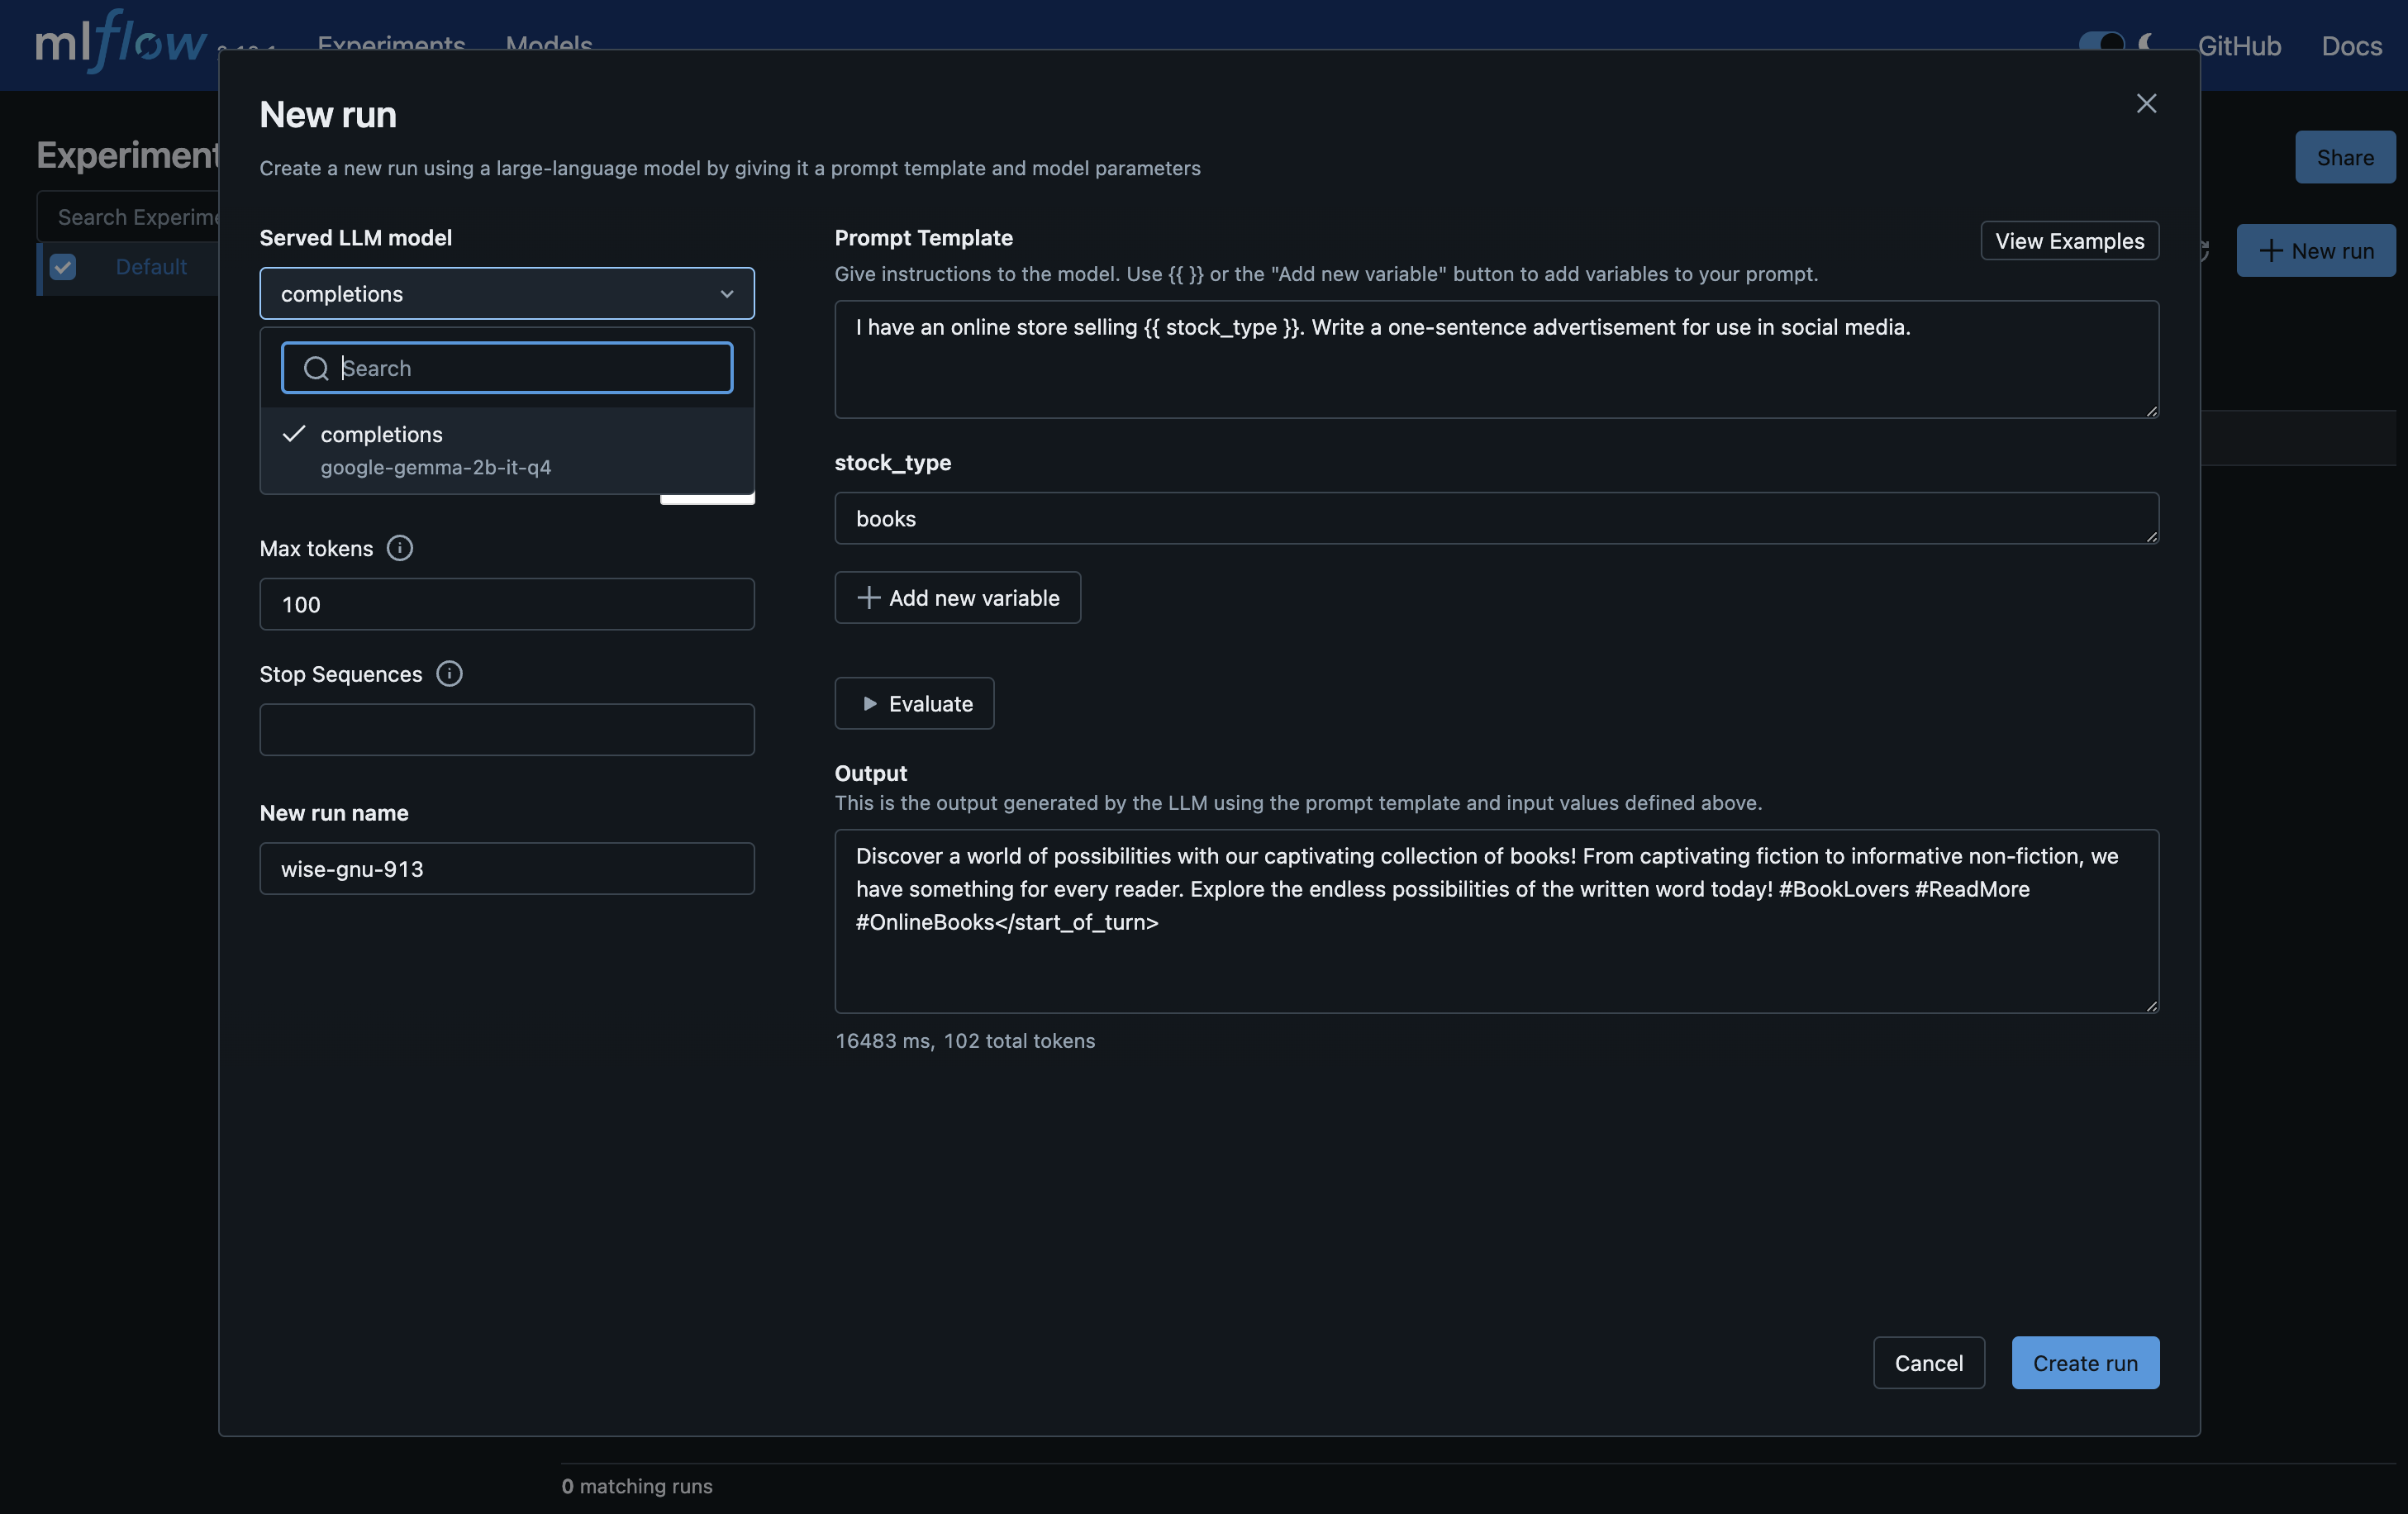
For example, you can deploy a MLflow Deployments Server for LLMs and use Prompt Engineering UI.
Deploying MLflow Tracking Server
Bitmani provides a Helm chart for MLflow.
helm upgrade \
  --install \
  --create-namespace \
  -n mlflow \
  mlflow oci://registry-1.docker.io/bitnamicharts/mlflow \
  -f values.yaml
An example values.yaml is following:
tracking:
  extraEnvVars:
  - name: MLFLOW_DEPLOYMENTS_TARGET
    value: http://deployment-server:7000
We set MLFLOW_DEPLOYMENTS_TARGET to the address of a MLflow Deployments Server that we will deploy in the next section.
Once deployed, you can set up port-forwarding and access http://localhost:9000.
kubectl port-forward -n mlflow service/mlflow-tracking 9000:80
The login credentials are obtained by the following commands:
# User
kubectl get secret --namespace mlflow mlflow-tracking -o jsonpath="{ .data.admin-user }" | base64 -d
# Password
kubectl get secret --namespace mlflow mlflow-tracking -o jsonpath="{.data.admin-password }" | base64 -d
Deploying MLflow Deployments Server for LLMs
We have an example K8s YAML for deploying a MLflow deployments server here.
You can save it locally, up openai_api_base in the ConfigMap definition based on your ingress controller address, and then run:
kubectl create secret generic -n mlflow llmariner-api-key \
  --from-literal=secret=<Your API key>

kubectl apply -n mlflow -f deployment-server.yaml
You can then access the MLflow Tracking Server, click "New run", and choose "using Prompt Engineering".
Other Features
Please visit MLflow page for more information for other LLM related features provided by MLflow.
10 - Langfuse
Langfuse is an open source LLM engineering platform. You can integrate Langfuse with LLMariner as Langfuse provides an SDK for the OpenAI API.
Here is an example procedure for running Langfuse locally:
git clone https://github.com/langfuse/langfuse.git
cd langfuse
docker compose up -d
You can sign up and create your account. Then you can generate API keys and put them in environmental variables.
export LANGFUSE_SECRET_KEY=...
export LANGFUSE_PUBLIC_KEY=...
export LANGFUSE_HOST="http://localhost:3000"
You can then use langfuse.openai instead of openai in your Python scripts
to record traces in Langfuse.
from langfuse.openai import openai

client = openai.OpenAI(
  base_url="<Base URL (e.g., http://localhost:8080/v1)>",
  api_key="<API key secret>"
)

completion = client.chat.completions.create(
  model="google-gemma-2b-it-q4_0",
  messages=[
    {"role": "user", "content": "What is k8s?"}
  ],
  stream=True
)
for response in completion:
  print(response.choices[0].delta.content, end="")
print("\n")
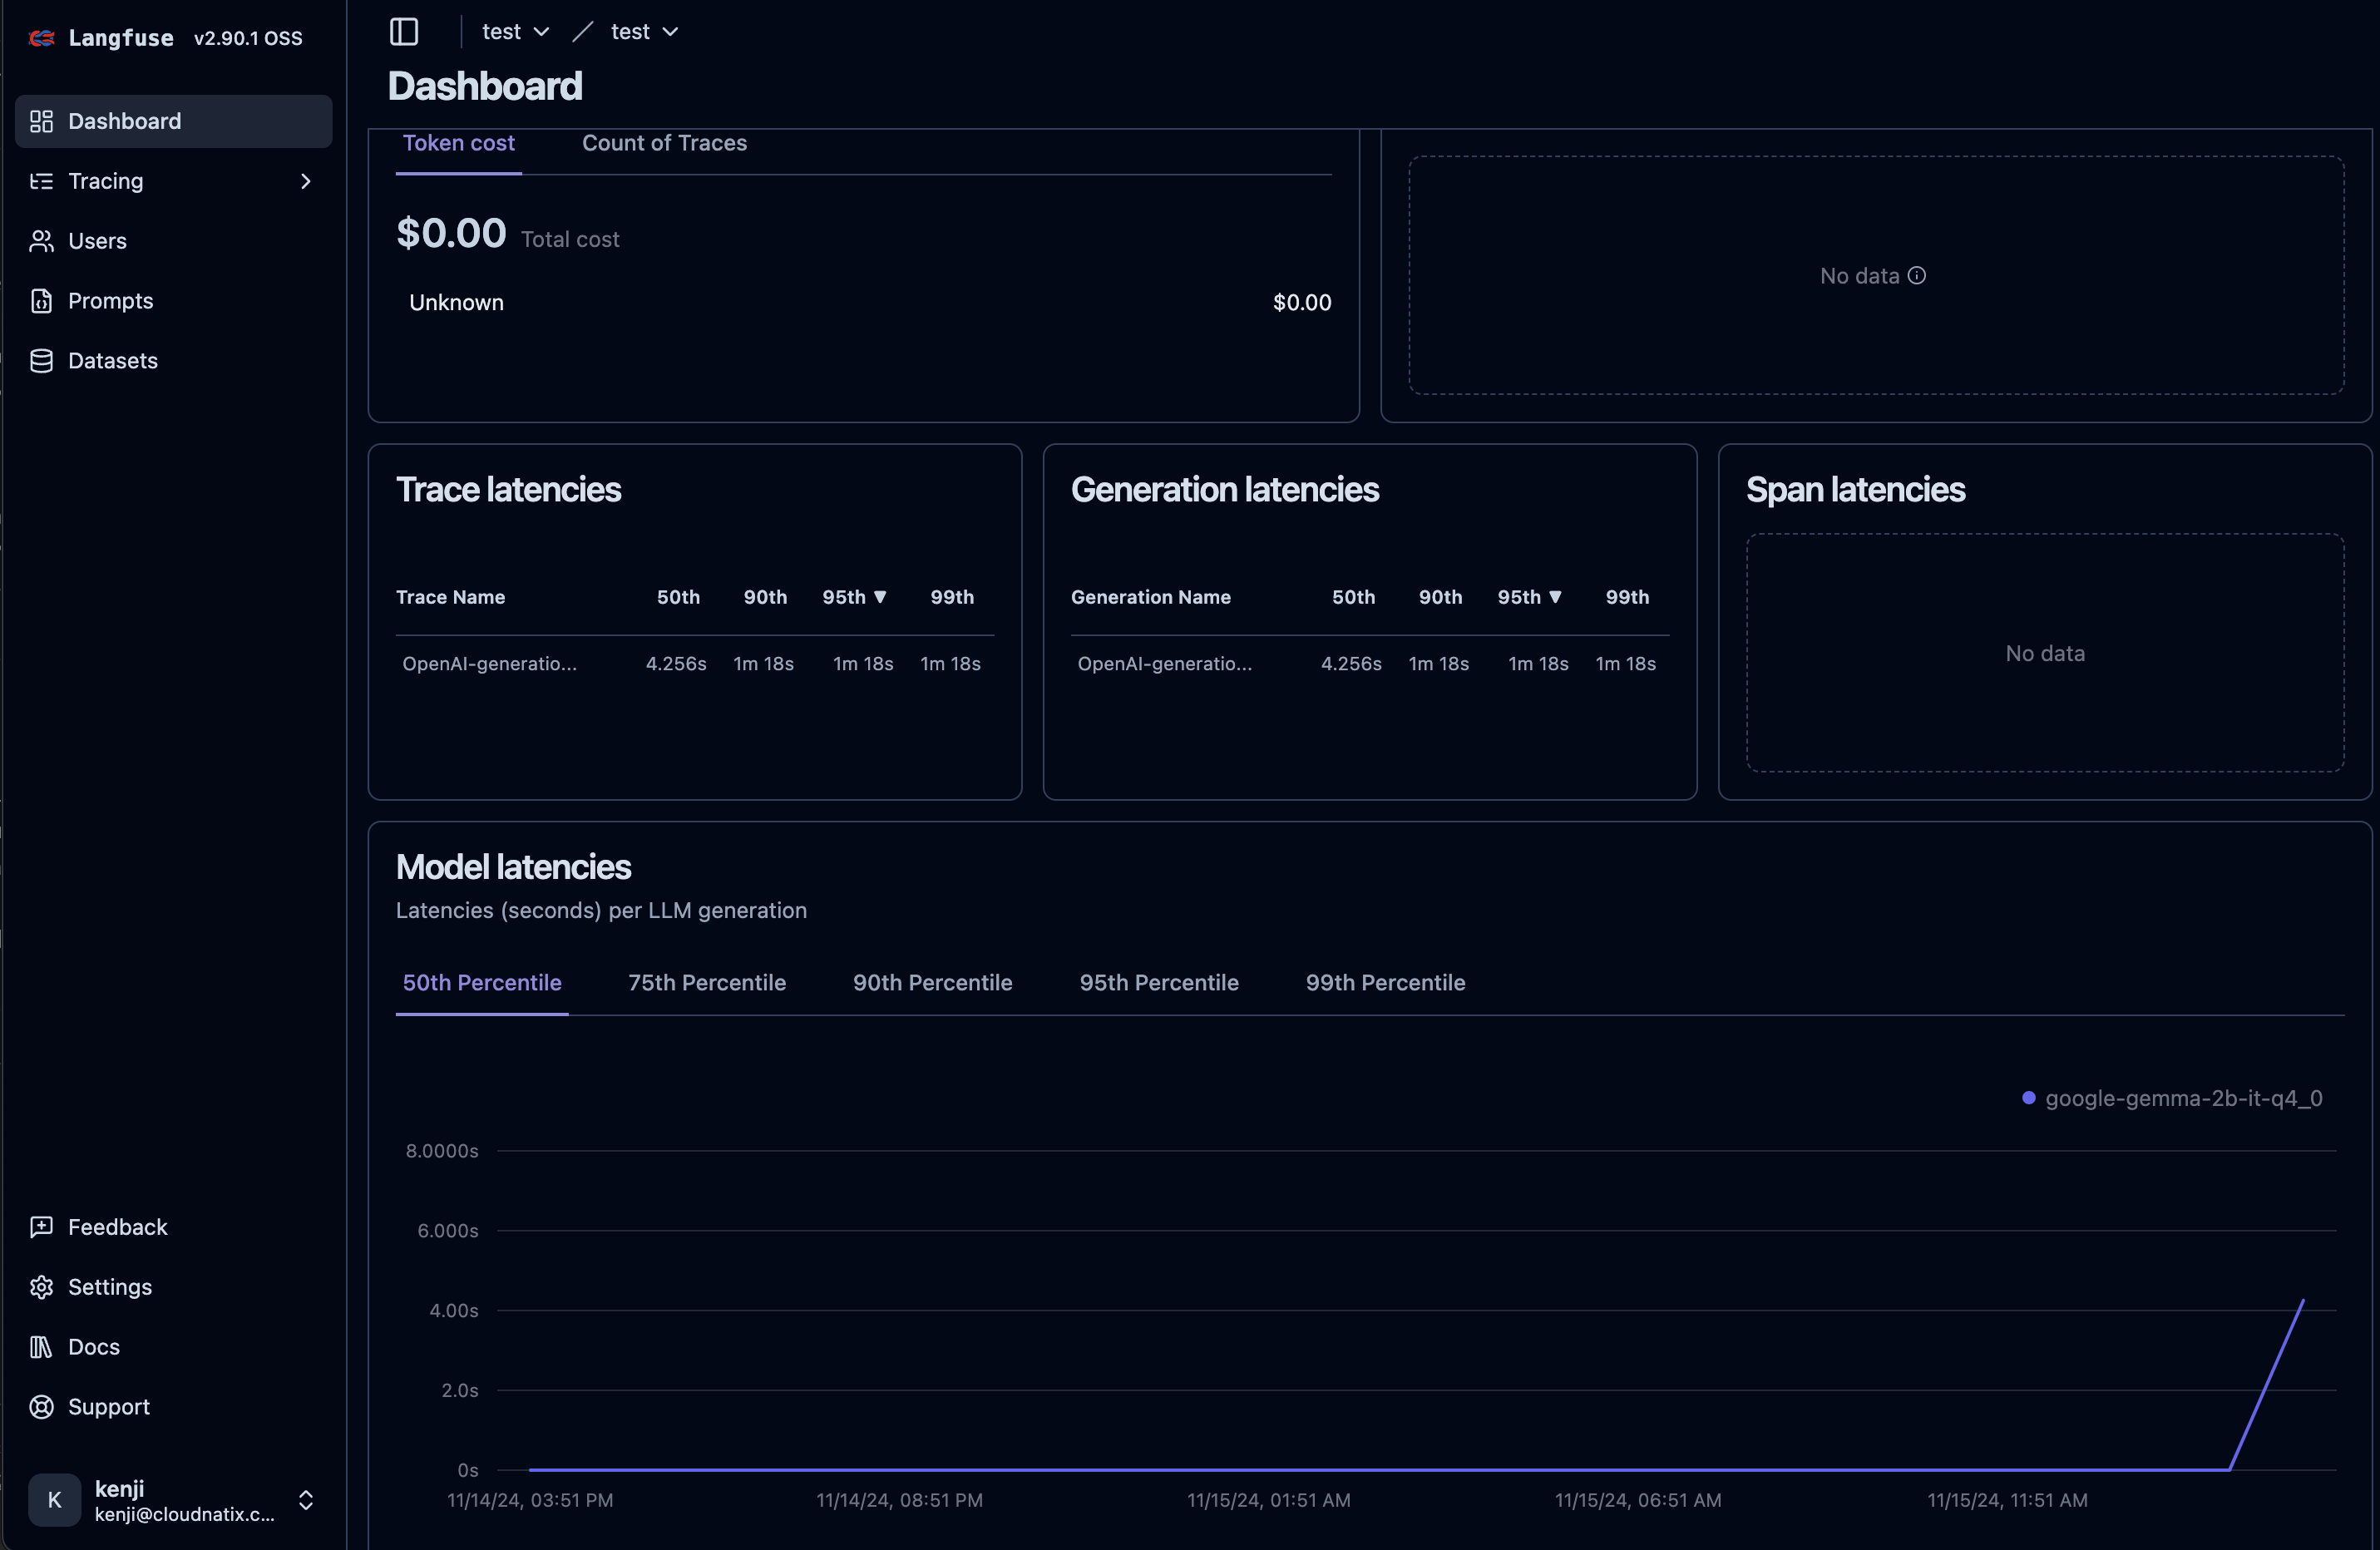
Here is an example screenshot.
11 - Weights & Biases (W&B)
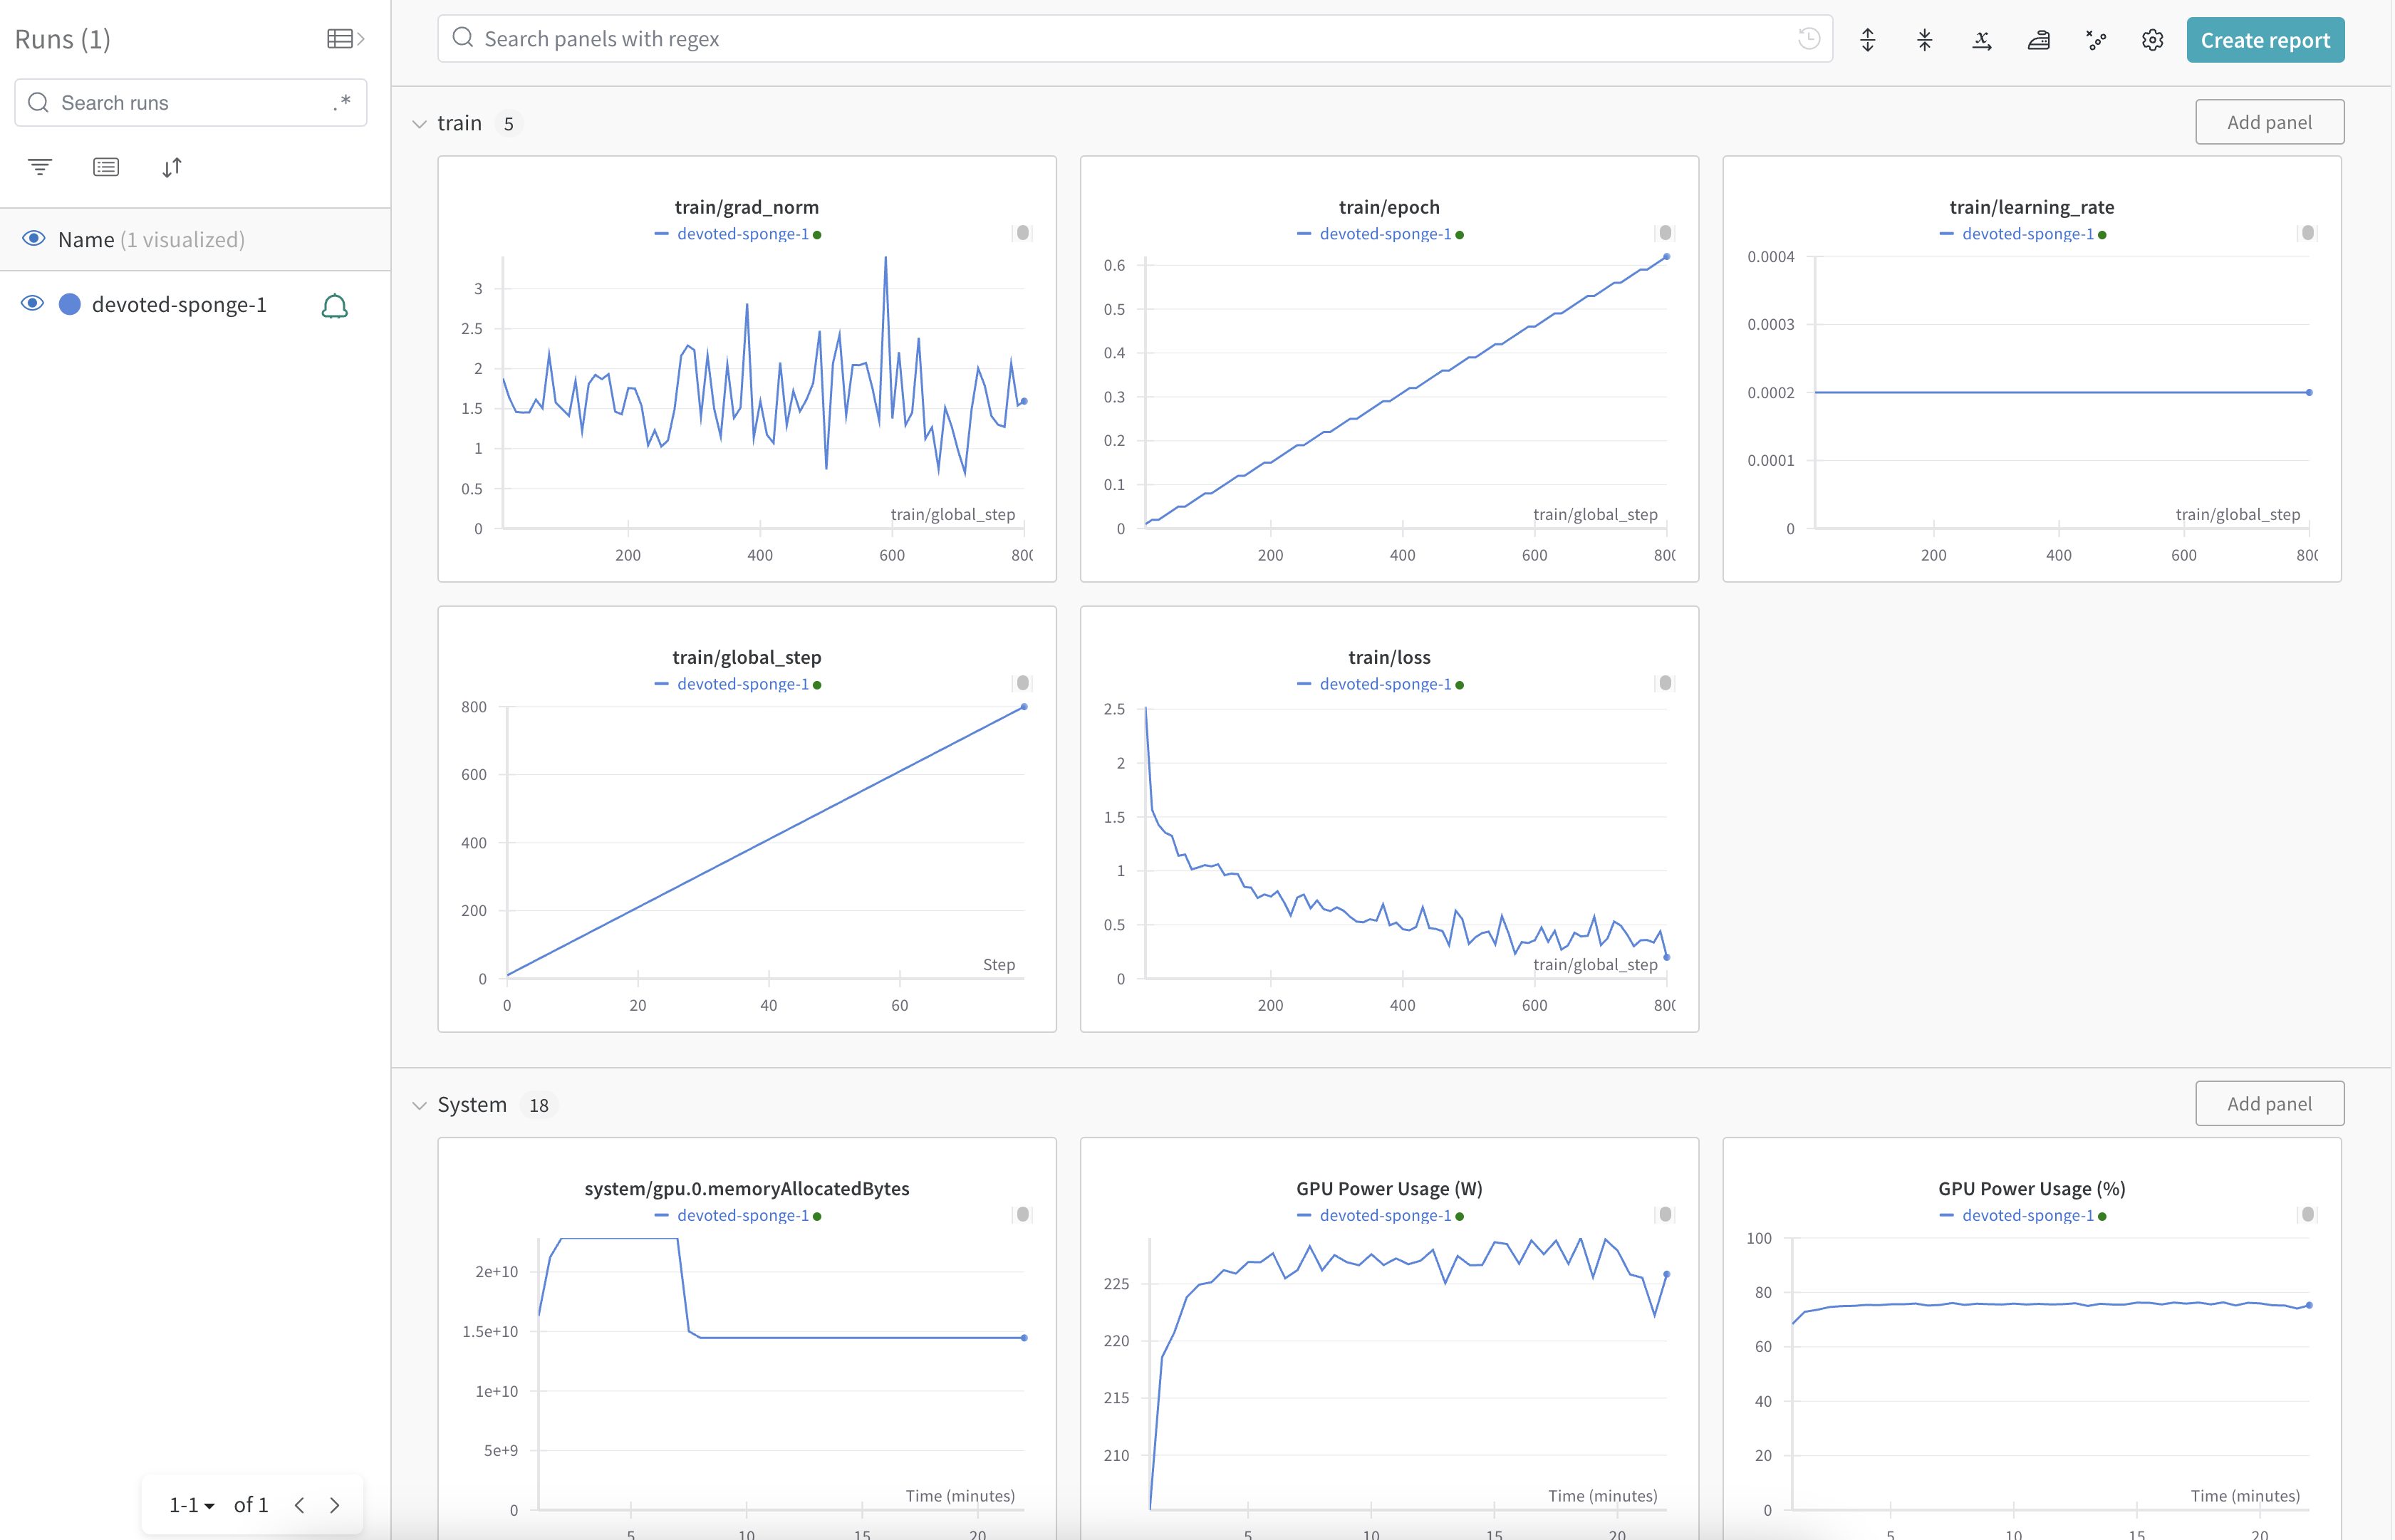
Weights and Biases (W&B) is an AI developer platform. LLMariner provides the integration with W&B so that metrics for fine-tuning jobs are reported to W&B. With the integration, you can easily see the progress of your fine-tuning jobs, such as training epoch, loss, etc.
Please take the following steps to enable the integration.
First, obtain the API key of W&B and create a Kubernetes secret.
kubectl create secret generic wandb
  -n <fine-tuning job namespace> \
  --from-literal=apiKey=${WANDB_API_KEY}
The secret needs to be created in a namespace where fine-tuning jobs run. Individual projects specify namespaces for fine-tuning jobs, and the default project runs fine-tuning jobs in the "default" namespace.
Then you can enable the integration by adding the following to your Helm values.yaml and re-deploying LLMariner.
job-manager-dispatcher:
  job:
    wandbApiKeySecret:
      name: wandb
      key: apiKey
A fine-tuning job will report to W&B when the integration parameter is specified.
job = client.fine_tuning.jobs.create(
  model="google-gemma-2b-it",
  suffix="fine-tuning",
  training_file=tfile.id,
  validation_file=vfile.id,
  integrations=[
    {
      "type": "wandb",
      "wandb": {
         "project": "my-test-project",
      },
    },
  ],
)
Here is an example screenshot. You can see metrics like train/loss in the W&B dashboard.
