This is the multi-page printable view of this section. Click here to print.
Features
1 - Inference with Open Models
llma CLI, or API endpoint.Chat Completion
Here is an example chat completion command with the llma CLI.
llma chat completions create --model google-gemma-2b-it-q4_0 --role user --completion "What is k8s?"
If you want to use the Python library, you first need to create an API key:
llma auth api-keys create <key name>
You can then pass the API key to initialize the OpenAI client and run the completion:
from openai import OpenAI

client = OpenAI(
  base_url="<Base URL (e.g., http://localhost:8080/v1)>",
  api_key="<API key secret>"
)

completion = client.chat.completions.create(
  model="google-gemma-2b-it-q4_0",
  messages=[
    {"role": "user", "content": "What is k8s?"}
  ],
  stream=True
)
for response in completion:
  print(response.choices[0].delta.content, end="")
print("\n")
You can also just call client = OpenAI() if you set environment variables OPENAI_BASE_URL and OPENAI_API_KEY.
If you want to hit the API endpoint directly, you can use curl. Here is an example.
curl \
  --request POST \
  --header "Authorization: Bearer ${LLMARINER_TOKEN}" \
  --header "Content-Type: application/json" \
  --data '{"model": "google-gemma-2b-it-q4_0", "messages": [{"role": "user", "content": "What is k8s?"}]}' \
  http://localhost:8080/v1/chat/completions
Please see the fine-tuning page if you want to generate a fine-tuning model and use that for chat completion.
Tool Calling
vLLM requires additional flags (link to use tool calling.
You can specify the flags with vllmExtraFlags. Here is an example configuration:
inference-manager-engine:
  ...
  model:
    overrides:
      meta-llama-Meta-Llama-3.3-70B-Instruct-fp8-dynamic:
        runtimeName: vllm
        resources:
          limits:
            nvidia.com/gpu: 4
        vllmExtraFlags:
        - --chat-template
        - examples/tool_chat_template_llama3.1_json.jinja
        - --enable-auto-tool-choice
        - --tool-call-parser
        - llama3_json
        - --max-model-len
        - "8192"
Here is an example curl command:
curl \
  --request POST \
  --header "Authorization: Bearer ${LLMARINER_TOKEN}" \
  --header "Content-Type: application/json" \
  --data '{
  "model": "meta-llama-Meta-Llama-3.3-70B-Instruct-fp8-dynamic",
  "messages": [{"role": "user", "content": "What is the weather like in San Francisco?"}],
  "tools": [{
    "type": "function",
    "function": {
      "name": "get_weather",
      "description": "Get current weather for a given location.",
        "parameters": {
          "type": "object",
          "properties": {
          "location": {
            "type": "string",
            "description": "City and country"
          }
        }
      },
      "strict": true
    }
  }]
}' http://localhost:8080/v1/chat/completions
The output will have the tool_calls in its message.
{
  ...
  "choices": [
    {
      "index": 0,
      "message": {
        "role": "assistant",
        "content": null,
        "tool_calls": [
          {
            "id": "chatcmpl-tool-e698e3e36f354d089302b79486e4a702",
            "type": "function",
            "function": {
              "name": "get_weather",
              "arguments": "{\"location\": \"San Francisco, USA\"}"
            }
          }
        ]
      },
      "logprobs": null,
      "finish_reason": "tool_calls",
      "stop_reason": 128008
    }
  ],
  ...
}
Audio Transcription
LLMariner supports the /v1/audio/transcriptions API. You can use a model like OpenAI/Whispter for this API.
CLI:
llma audio transcriptions create --model openai-whisper-large-v3-turbo --file <audio file>
Python:
from openai import OpenAI

client = OpenAI(
  base_url="<Base URL (e.g., http://localhost:8080/v1)>",
  api_key="<API key secret>"
)

response = client.audio.transcriptions.create(
    model="openai-whisper-large-v3-turbo",
    file=open("<audio file>", "rb")
)
print(response)
curl:
curl \
  --request POST \
  --header "Authorization: Bearer ${LLMARINER_TOKEN}" \
  --header "Content-Type: multipart/form-data" \
  -F model=openai-whisper-large-v3-turbo \
  -F file="@<audio file>" \
  http://localhost:8080/v1/audio/transcriptions
Model Response API
LLMariner supports the /v1/responses API. You can, for example, use openai/gpt-oss-120b for this API.
curl \
  --request POST \
  --header "Authorization: Bearer ${LLMARINER_TOKEN}" \
  --header 'Content-Type: application/json' \
  --data '{
   "model": "openai-gpt-oss-120b",
   "input": "What is the capital of France?",
   "tools": [{
     "type": "function",
     "name": "get_weather",
     "description": "Get current temperature for a given location.",
     "parameters": {
       "type": "object",
       "properties": {
         "location": {
           "type": "string",
           "description": "City and country e.g. Bogotá, Colombia"
         }
       },
       "required": [
         "location"
       ],
       "additionalProperties": false
     }
   }],
   "tool_choice": "auto"
}' \
  http://localhost:8080/v1/responses
Model Runtime Configuration
We currently support vLLM, Ollama, and Nvidia Triton Inference Server
as an inference runtime. You can change a runtime for each model. For
example, in the following configuration, the default runtime is set to
vLLM, and Ollama is used for deepseek-r1:1.5b.
inference-manager-engine:
  ...
  model:
    default:
      runtimeName: vllm  # Default runtime
      resources:
        limits:
          nvidia.com/gpu: 1
    overrides:
      lmstudio-community/phi-4-GGUF/phi-4-Q6_K.gguf:
        preloaded: true
        vllmExtraFlags:
        - --tokenizer
        - microsoft/phi-4
      deepseek-r1:1.5b:
        runtimeName: ollama # Override the default runtime
        preloaded: true
        resources:
          limits:
            nvidia.com/gpu: 0
By default, one Pod serves only one pod. If you want to make one Ollama pod serve multiple models, you can set dynamicModelLoading to true.
inference-manager-engine:
  ollama:
    dynamicModelLoading: true
2 - Model Loading
Overview
LLMariner hosts LLMs in a Kubernetes cluster by downloading models from source repos and uploading to an S3-compatible object store. The supported source model repositories are following:
- LLMariner official model repository
- Hugging Face repositories
- Ollama repositories
- S3 bucket
If you already know models that you would like to download, you can specify them
in values.yaml. Here is an example configuration where two models are downloaded from
the LLMariner official model repository.
model-manager-loader:
  baseModels:
  - google/gemma-2b-it-q4_0
  - sentence-transformers/all-MiniLM-L6-v2-f16
You can always update values.yaml and upgrade the Helm chart to download additional models.
You can also run llma models (base|fine-tuned) create to download additional models. For example, the following command
will download deepseek-r1:1.5b from the Ollama repository.
llma models create base deepseek-r1:1.5b --source-repository ollama
You can check the status of the download with:
llma models list
Once the download has been completed, you can activate the model. The activated model becomes ready
for inference once inference-manager-engine loads the model.
Note
To download models from Hugging Face, you need additional configuration to embed the Hugging Face API key tomodel-manager-loader. Please see the page below for details.Model Configuration
There are two ways to configure model deployment: Helm chart and model API.
In the Helm chart, you can put your own configuration under inference-manager-engine.model and
control GPU allocation, extra flags to runtime, number of replicas, etc. Here is an example:
inference-manager-engine:
  model:
    default:
      runtimeName: vllm
      replicas: 1
      resources:
        limits:
          nvidia.com/gpu: 1
    overrides:
      meta-llama/Llama-3.2-1B-Instruct:
        vllmExtraFlags:
        - --enable-lora
        - --max-lora-rank
        - "64"
      openai/gpt-oss-120b:
        image: vllm/vllm-openai:gptoss
        replicas: 2
Please see https://artifacthub.io/packages/helm/inference-manager-engine/inference-manager-engine?modal=values for details.
To use the model API to configure model deployment, you first
need to set inference-manager-engine.model.enableOverrideWithModelConfig to true.
Then you can specify the deployment configuration when running llma models (base|fine-tuned) create or llma models update. For example,
the following command will deploy four replicas of an inference
runtime to serve deepseek-r1:1.5b. Two GPUs are allocated to each
replica.
llma models create base deepseek-r1:1.5b \
  --source-repository ollama \
  --replicas 4 \
  --gpu 2
Official Model Repository
This is the default configuration. The following is a list of supported models where we have validated.
| Model | Quantizations | Supporting runtimes |
|---|---|---|
| TinyLlama/TinyLlama-1.1B-Chat-v1.0 | None | vLLM |
| TinyLlama/TinyLlama-1.1B-Chat-v1.0 | AWQ | vLLM |
| deepseek-ai/DeepSeek-Coder-V2-Lite-Base | Q2_K, Q3_K_M, Q3_K_S, Q4_0 | Ollama |
| deepseek-ai/DeepSeek-Coder-V2-Lite-Instruct | Q2_K, Q3_K_M, Q3_K_S, Q4_0 | Ollama |
| deepseek-ai/deepseek-coder-6.7b-base | None | vLLM, Ollama |
| deepseek-ai/deepseek-coder-6.7b-base | AWQ | vLLM |
| deepseek-ai/deepseek-coder-6.7b-base | Q4_0 | vLLM, Ollama |
| fixie-ai/ultravox-v0_3 | None | vLLM |
| google/gemma-2b-it | None | Ollama |
| google/gemma-2b-it | Q4_0 | Ollama |
| intfloat/e5-mistral-7b-instruct | None | vLLM |
| meta-llama/Llama-3.2-1B-Instruct | None | vLLM |
| meta-llama/Meta-Llama-3.3-70B-Instruct | AWQ, FP8-Dynamic | vLLM |
| meta-llama/Meta-Llama-3.1-70B-Instruct | AWQ | vLLM |
| meta-llama/Meta-Llama-3.1-70B-Instruct | Q2_K, Q3_K_M, Q3_K_S, Q4_0 | vLLM, Ollama |
| meta-llama/Meta-Llama-3.1-8B-Instruct | None | vLLM |
| meta-llama/Meta-Llama-3.1-8B-Instruct | AWQ | vLLM, Triton |
| meta-llama/Meta-Llama-3.1-8B-Instruct | Q4_0 | vLLM, Ollama |
| nvidia/Llama-3.1-Nemotron-70B-Instruct | Q2_K, Q3_K_M, Q3_K_S, Q4_0 | vLLM |
| nvidia/Llama-3.1-Nemotron-70B-Instruct | FP8-Dynamic | vLLM |
| mistralai/Mistral-7B-Instruct-v0.2 | Q4_0 | Ollama |
| sentence-transformers/all-MiniLM-L6-v2-f16 | None | Ollama |
Please note that some models work only with specific inference runtimes.
Hugging Face Repositories
First, create a k8s secret that contains the Hugging Face API key.
kubectl create secret generic \
  huggingface-key \
  -n llmariner \
  --from-literal=apiKey=${HUGGING_FACE_HUB_TOKEN}
The above command assumes that LLMarine runs in the llmariner namespace.
Then deploy LLMariner with the following values.yaml.
model-manager-loader:
  downloader:
    kind: huggingFace
    huggingFace:
      cacheDir: /tmp/.cache
  huggingFaceSecret:
    name: huggingface-key
    apiKeyKey: apiKey

  baseModels:
  - Qwen/Qwen2-7B
  - TheBloke/TinyLlama-1.1B-Chat-v1.0-AWQ
Then the model should be loaded by model-manager-loader. Once the loading completes, the model name
should show up in the output of llma models list.
When you use a GGUF model with vLLM, please specify --tokenizer=<original model> in vllmExtraFlags. Here is an example
configuration for Phi 4.
inference-manager-engine:
  ...
  model:
    default:
      runtimeName: vllm
    overrides:
      lmstudio-community/phi-4-GGUF/phi-4-Q6_K.gguf:
        preloaded: true
        resources:
          limits:
            nvidia.com/gpu: 1
        vllmExtraFlags:
        - --tokenizer
        - microsoft/phi-4
Ollama Repositories
You can configure Ollama as model source repos by setting model-manager-loader.downloader.kind to ollama. The following is an example values.yaml that downloads deepseek-r1:1.5b from Ollama.
model-manager-loader:
  downloader:
    kind: ollama
  baseModels:
  - deepseek-r1:1.5b
S3 Bucket
If you want to download models from your S3 bucket, you can specify the bucket configuration under
model-manager-loader.downloader.s3. For example, if you store model files under s3://my-models/v1/base-models/<model-name>,
you can specify the downloader config as follows:
model-manager-loader:
  downloader:
    kind: s3
    s3:
      # The s3 endpoint URL.
      endpointUrl: https://s3.us-west-2.amazonaws.com
      # The region name where the models are stored.
      region: us-west-2
      # The bucket name where the models are stored.
      bucket: my-models
      # The path prefix of the model.
      pathPrefix: v1/base-models
      # Set to true if the bucket is public and we don't want to
      # use the credential attached to the pod.
      isPublic: false
3 - Retrieval-Augmented Generation (RAG)
Embedding API
If you want to just generate embeddings, you can use the Embedding API, which is compatible with the OpenAI API.
Here are examples:
llma embeddings create --model intfloat-e5-mistral-7b-instruct --input "sample text"


curl \
  --request POST \
  --header "Authorization: Bearer ${LLMARINER_TOKEN}" \
  --header "Content-Type: application/json" \
  --data '{
   "model": "sentence-transformers-all-MiniLM-L6-v2-f16",
   "input": "sample text"
 }' \
 http://localhost:8080/v1/embeddings
Vector Store API
The first step is to create a vector store and create files in the vector store. Here is an example script with the OpenAI Python library:
from openai import OpenAI

client = OpenAI(
  base_url="<LLMariner Endpoint URL>",
  api_key="<LLMariner API key>"
)

filename = "llmariner_overview.txt"
with open(filename, "w") as fp:
  fp.write("LLMariner builds a software stack that provides LLM as a service. It provides the OpenAI-compatible API.")
file = client.files.create(
  file=open(filename, "rb"),
  purpose="assistants",
)
print("Uploaded file. ID=%s" % file.id)

vs = client.beta.vector_stores.create(
  name='Test vector store',
)
print("Created vector store. ID=%s" % vs.id)

vfs = client.beta.vector_stores.files.create(
  vector_store_id=vs.id,
  file_id=file.id,
)
print("Created vector store file. ID=%s" % vfs.id)
Once the files are added into vector store, you can run the completion request with the RAG model.
from openai import OpenAI

client = OpenAI(
  base_url="<Base URL (e.g., http://localhost:8080/v1)>",
  api_key="<API key secret>"
)

completion = client.chat.completions.create(
  model="google-gemma-2b-it-q4_0",
  messages=[
    {"role": "user", "content": "What is LLMariner?"}
  ],
  tool_choice = {
   "choice": "auto",
   "type": "function",
   "function": {
     "name": "rag"
   }
 },
 tools = [
   {
     "type": "function",
     "function": {
       "name": "rag",
       "parameters": {
         "vector_store_name": "Test vector store"
       }
     }
   }
 ],
  stream=True
)
for response in completion:
  print(response.choices[0].delta.content, end="")
print("\n")
If you want to hit the API endpoint directly, you can use curl. Here is an example.
curl \
  --request POST \
  --header "Authorization: Bearer ${LLMARINER_TOKEN}" \
  --header "Content-Type: application/json" \
  --data '{
   "model": "google-gemma-2b-it-q4_0",
   "messages": [{"role": "user", "content": "What is LLMariner?"}],
   "tool_choice": {
     "choice": "auto",
     "type": "function",
     "function": {
       "name": "rag"
     }
   },
   "tools": [{
     "type": "function",
     "function": {
     "name": "rag",
       "parameters": "{\"vector_store_name\":\"Test vector store\"}"
     }
 }]}' \
 http://localhost:8080/v1/chat/completions
4 - Model Fine-tuning
Submitting a Fine-Tuning Job
You can use the OpenAI Python library to submit a fine-tuning job. Here is an example snippet that uploads a training file and uses that to run a fine-tuning job.
from openai import OpenAI

client = OpenAI(
  base_url="<LLMariner Endpoint URL>",
  api_key="<LLMariner API key>"
)

file = client.files.create(
  file=open(training_filename, "rb"),
  purpose="fine-tune",
)

job = client.fine_tuning.jobs.create(
  model="google-gemma-2b-it",
  suffix="fine-tuning",
  training_file=file.id,
)
print('Created job. ID=%s' % job.id)
Once a fine-tuning job is submitted, a k8s Job is created. A Job runs in a namespace where a user's project is associated.
You can check the status of the job with the Python script or the llma CLI.
print(client.fine_tuning.jobs.list())
llma fine-tuning jobs list
llma fine-tuning jobs get <job-id>
Once the job completes, you can check the generated models.
fine_tuned_model = client.fine_tuning.jobs.list().data[0].fine_tuned_model
print(fine_tuned_model)
Then you can get the model ID and use that for the chat completion request.
completion = client.chat.completions.create(
  model=fine_tuned_model,
  ...
Create File Objects without Uploading
You can also create file objects without uploading. The following command creates a file for a specified S3 object.
llma storage files create-link --object-path models/my-model --purpose fine-tune
This option is useful when the S3 bucket is not accessible from the LLMariner control-plane component.
Note
Please note that specified file objects will be accessible from fine-tuning jobs. You should not create a file of an S3 object if the object should not be visible to users who can submit fine-tuning jobs.Debugging a Fine-Tuning Job
You can use the llma CLI to check the logs and exec into the pod.
llma fine-tuning jobs logs <job-id>
llma fine-tuning jobs exec <job-id>
Changing the Number of GPUs allocated to Jobs
By default one GPU is allocated to each fine-tuning job. If you want to change the number
of GPUs allocated to jobs, please change the value of job-manager-dispatcher.job.numGpus in Helm values.
For example, the following will allocate 4 GPUs to each fine-tuning job.
job-manager-dispatcher:
  job:
    numGpus: 4
Managing Quota
LLMariner allows users to manage GPU quotas with integration with Kueue.
You can install Kueue with the following command:
export VERSION=v0.6.2
kubectl apply -f https://github.com/kubernetes-sigs/kueue/releases/download/$VERSION/manifests.yaml
Once the install completes, you should see kueue-controller-manager in the kueue-system namespace.
$ kubectl get po -n kueue-system
NAME                                        READY   STATUS    RESTARTS   AGE
kueue-controller-manager-568995d897-bzxg6   2/2     Running   0          161m
You can then define ResourceFlavor, ClusterQueue, and LocalQueue to manage quota. For example, when you want to allocate 10 GPUs to team-a whose project namespace is team-a-ns, you can define ClusterQueue and LocalQueue as follows:
apiVersion: kueue.x-k8s.io/v1beta1
kind: ClusterQueue
metadata:
  name: team-a
spec:
  namespaceSelector: {} # match all.
  cohort: org-x
  resourceGroups:
  - coveredResources: [gpu]
    flavors:
    - name: gpu-flavor
      resources:
      - name: gpu
        nominalQuota: 10
---
apiVersion: kueue.x-k8s.io/v1beta1
kind: LocalQueue
metadata:
  namespace: team-a-ns
  name: team-a-queue
spec:
  clusterQueue: team-a
Enabling Dynamic LoRA loading
By default, an inference runtime pod is created for each fine-tuned model. If you want to load LoRA on a pod that serves a base model, enable dynamic LoRA loading.
You need to set inference-manager-engine.vllm.dynamicLoRALoading to true and add --enable-lora to vllmExtraFlags of the base model.
Here is an example configuration.
inference-manager-engine:
  vllm:
    dynamicLoRALoading: true
  model:
    default:
	   ...
    overrides:
      Qwen/Qwen3-1.7B:
        vllmExtraFlags:
        - --enable-lora
        - --max-lora-rank
        - "64"
5 - General-purpose Training
Creating a Training Job
You can create a training job from the local pytorch code by running the following command.
llma batch jobs create \
  --image="pytorch-2.1" \
  --from-file=my-pytorch-script.py \
  --from-file=requirements.txt \
  --file-id=<file-id> \
  --command "python -u /scripts/my-pytorch-script.py"
Once a training job is created, a k8s Job is created. The job runs the command specified in the --command flag, and files specified in the --from-file flag are mounted to the /scripts directory in the container. If you specify the --file-id flag (optional), the file will be download to the /data directory in the container.
You can check the status of the job by running the following command.
llma batch jobs list
llma batch jobs get <job-id>
Debugging a Training Job
You can use the llma CLI to check the logs of a training job.
llma batch jobs logs <job-id>
PyTorch Distributed Data Parallel
LLMariner supports PyTorch Distributed Data Parallel (DDP) training. You can run a DDP training job by specifying the number of per-node GPUs and the number of workers in the --gpu and --workers flags, respectively.
llma batch jobs create \
  --image="pytorch-2.1" \
  --from-file=my-pytorch-ddp-script.py \
  --gpu=1 \
  --workers=3 \
  --command "python -u /scripts/my-pytorch-ddp-script.py"
Created training job is pre-configured some DDP environment variables; MASTER_ADDR, MASTER_PORT, WORLD_SIZE, and RANK.
6 - Jupyter Notebook
Creating a Jupyter Notebook
To create a Jupyter Notebook, run:
llma workspace notebooks create my-notebook
By default, there is no GPU allocated to the Jupyter Notebook. If you want to allocate a GPU to the Jupyter Notebook, run:
llma workspace notebooks create my-gpu-notebook --gpu 1
There are other options that you can specify when creating a Jupyter Notebook, such as environment. You can see the list of options by using the --help flag.
Once the Jupyter Notebook is created, you can access it by running:
# Open the Jupyter Notebook in your browser
llma workspace notebooks open my-notebook
Stopping and Restarting a Jupyter Notebook
To stop a Jupyter Notebook, run:
llma workspace notebooks stop my-notebook
To restart a Jupyter Notebook, run:
llma workspace notebooks start my-notebook
You can check the current status of the Jupyter Notebook by running:
llma workspace notebooks list
llma workspace notebooks get my-notebook
OpenAI API Integration
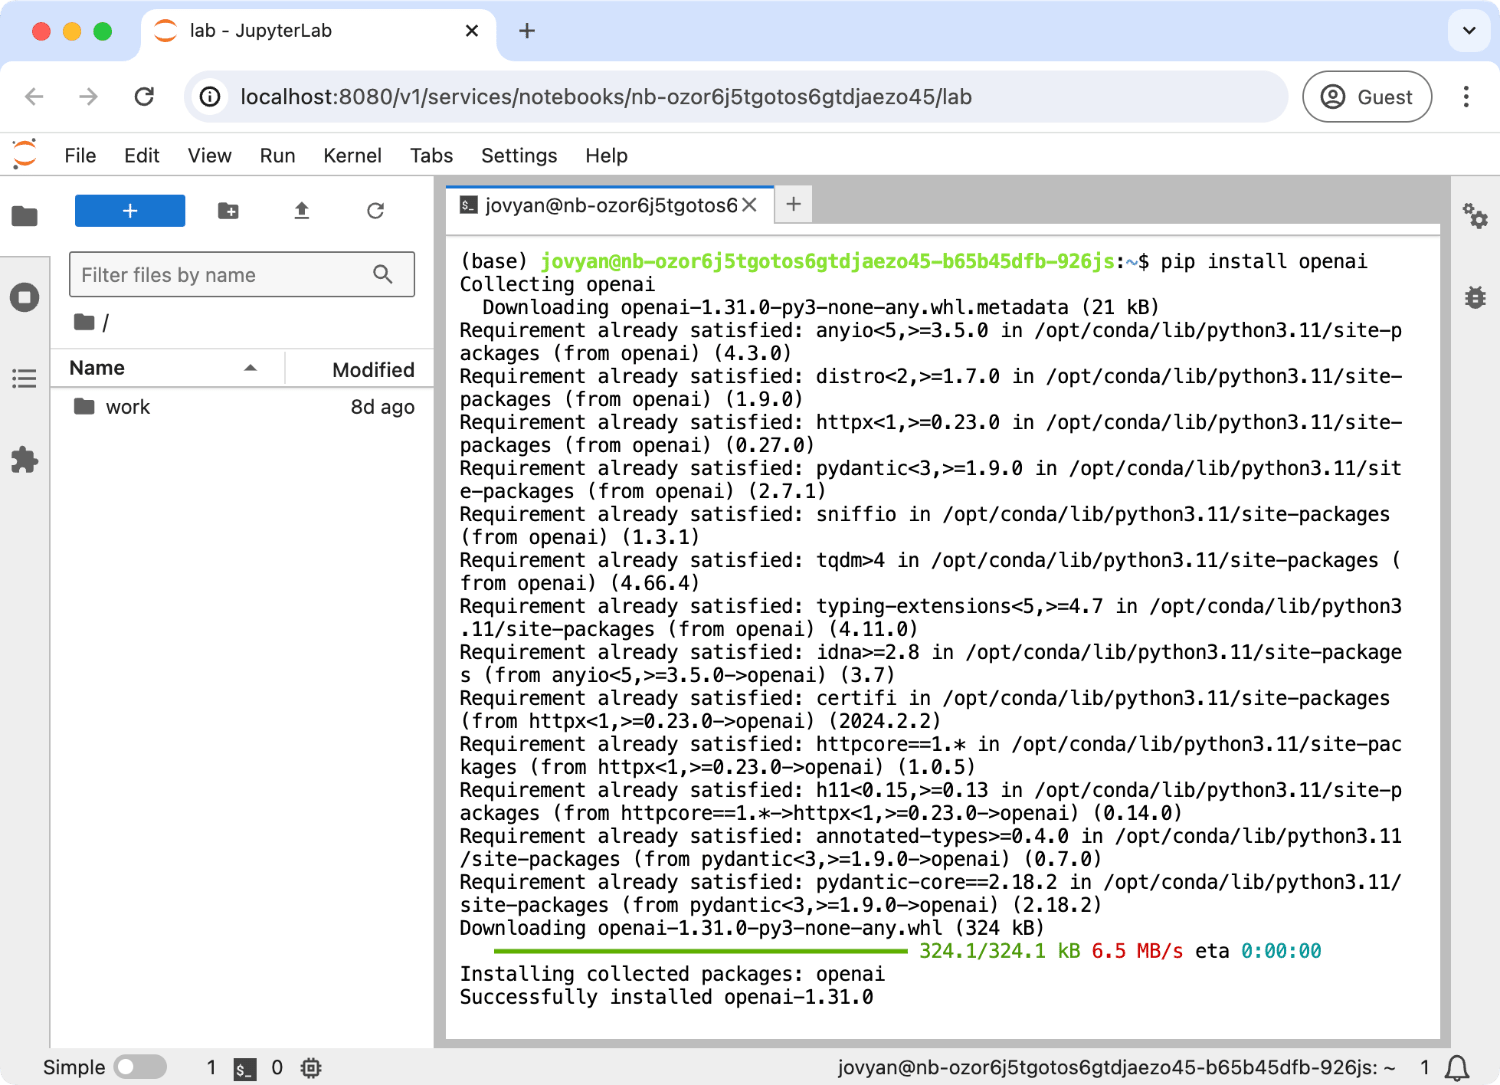
Jupyter Notebook can be integrated with OpenAI API. Created Jupyter Notebook is pre-configured with OpenAI API URL and API key. All you need to do is to install the openai package.
To install openai package, run the following command in the Jupyter Notebook terminal:
pip install openai
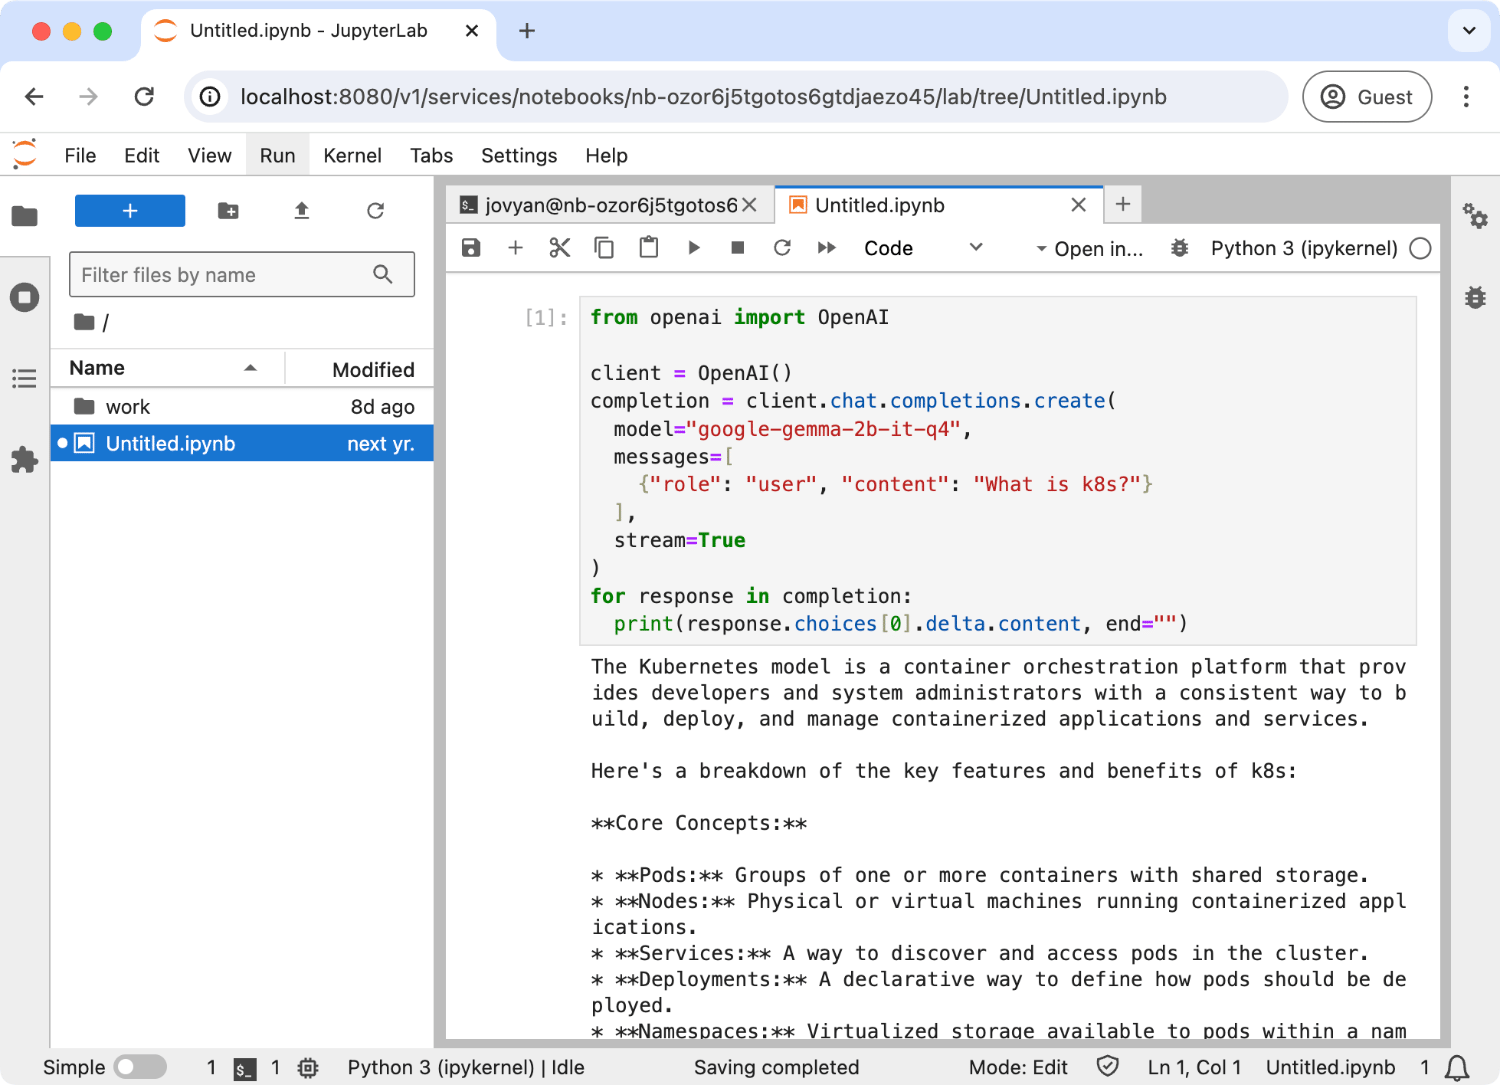
Now, you can use the OpenAI API in the Jupyter Notebook. Here is an example of using OpenAI API in the Jupyter Notebook:
from openai import OpenAI

client = OpenAI()
completion = client.chat.completions.create(
  model="google-gemma-2b-it-q4_0",
  messages=[
    {"role": "user", "content": "What is k8s?"}
  ],
  stream=True
)
for response in completion:
  print(response.choices[0].delta.content, end="")
print("\n")
Note
By default, pre-configured API key is a JWT and it can expire. You can also pass your API key to theOpenAI client.Running vLLM inside the Jupyter Notebook
You can run a vLLM server inside a Jupyter Notebook and access it from your local desktop/laptop.
First, create a Notebook with --gpu and --port. --gpu will allocate a GPU to the Notebook pod, and --port will expose a specified port externally. For example, the following command will create a Notebook with one GPU and expose port 8000.
llma workspace notebooks create my-notebook --gpu 1 --port 8000
Once the Notebook starts running, access it.
llma workspace notebooks open my-notebook
Then go to the terminal and run:
pip install vllm

# To resolve the vLLM dependency issue.
pip install "numpy<2"

# You can choose other model. Set env var HUGGING_FACE_HUB_TOKEN if needed.
vllm serve TinyLlama/TinyLlama-1.1B-Chat-v1.0
This will start a vLLM server at port 8000.
You can obtain the base URL of the vLLM server with the following command:
llma workspace notebooks open my-notebook --port 8000 --no-open
You need to set the Authorization header of requests to an LLMariner API key. Here is an example to list model and send a chat completion request.
LLMARINER_BASE_URL=$(llma workspace notebooks open vllm-test --port 8000 --no-open | grep http)

# Create a new API key and save its secret
LLMARINER_TOKEN=$(llma auth api-keys create test-key | sed -n 's/.*Secret: \(.*\)/\1/p')

# List models.
curl \
  --header "Authorization: Bearer ${LLMARINER_TOKEN}" \
  --header "Content-Type: application/json" \
  "${LLMARINER_BASE_URL}/v1/models" | jq .

# Send a chat completion request.
curl \
  --request POST \
  --header "Authorization: Bearer ${LLMARINER_TOKEN}" \
  --header "Content-Type: application/json" \
  --data '{"model": "TinyLlama/TinyLlama-1.1B-Chat-v1.0", "messages": [{"role": "user", "content": "What is k8s?"}]}' \
  "${LLMARINER_BASE_URL}/v1/chat/completions" | jq .
7 - API and GPU Usage Optimization
Note
Work-in-progress.API Usage Visibility
Inference Request Rate-limiting
Optimize GPU Utilization
Auto-scaling of Inference Runtimes
Scheduled Scale Up and Down of Inference Runtimes
If you want to scale up/down model runtimes based on certain schedules, you can enable the scheduled shutdown feature.
Here is an example values.yaml.
  inference-manager-engine:
    runtime:
      scheduledShutdown:
        enable: true
        schedule:
         # Pods are up between 9AM to 5PM.
         scaleUp:   "0 9 * * *"
         scaleDown: "0 17 * * *"
         timeZone: "Asia/Tokyo"
8 - GPU Federation
Overview
LLMariner GPU federation creates a global pool of GPUs across multiple clusters so that end users can submit training jobs without knowing GPU availability of individual K8s clusters.
End users can continue to use their existing tools to interact with
the global GPU pool. For example, a user can create a new job with
kubectl create. LLMariner schedules it one of the worker clusters
where a sufficient number of GPUs are available, and pods will start
running there.
Please see this demo video for an example job submissions flow.
Install Procedure
Prerequisites
The following K8s clusters are required:
- A k8s cluster for running the LLMariner control plane
- Worker k8s clusters with GPU nodes
- A k8s cluster that works as an aggregation point for the worker clusters (Hereafter we call this proxy cluster)
The proxy cluster does not require GPU nodes.
Step 1. Install the LLMariner control plane and worker plane
Follow multi_cluster_deployment and install the LLMariner control plane and worker plane.
Step 2. Create a service account API key and a k8s secret
Run the following command to create an API key for the service account.
llma auth api-keys create key-for-proxy-cluster --service-account --role tenant-system
We use this API key in the proxy cluster. Run the following command to create a K8s secret in the proxy cluster.
kubectl create namesapce llmariner
kubectl create secret -n llmariner generic syncer-api-key --from-literal=key=<API key secret>
Step 3. Install job-manager-syncer in the proxy cluster
Run:
helm upgrade \
  --install \
  -n llmariner \
  llmariner \
  oci://public.ecr.aws/cloudnatix/llmariner-charts/llmariner \
  -f ./values.yaml
Here is the example values.yaml.
tags:
  # Set these to only deploy job-manager-syncer
  control-plane: false
  worker: false
  tenant-control-plane: true

job-manager-syncer:
  # The gRPC endpoint of LLMariner control plane (same value as `global.worker.controlPlaneAddr` in the worker plane config).
  jobManagerServerSyncerServiceAddr: control-plane:80
  # The base URL of the LLMariner API endpoint.
  sessionManagerEndpoint: http://control-plane/v1
  tenant:
    # k8s secret name and key that contains the LLMariner API key secret.
    apiKeySecret:
      name: syncer-api-key
      key: key
Step 4. Submit a test job to the proxy cluster
Use kubectl or other command and submit a test job requesting GPU to the proxy cluster. The submitted job will be redirected to
one of the worker clusters that have been registered.
9 - User Management
LLMariner installs Dex by default. Dex is an identity service that uses OpenID Connect for authentication.
The Helm chart for Dex is located at https://github.com/llmariner/rbac-manager/tree/main/deployments/dex-server. It uses a built-in local connector and has the following configuration by default:
staticPasswords:
- userID: 08a8684b-db88-4b73-90a9-3cd1661f5466
  username: admin
  email: admin@example.com
  # bcrypt hash of the string: $(echo password | htpasswd -BinC 10 admin | cut -d: -f2)
  hash: "$2a$10$2b2cU8CPhOTaGrs1HRQuAueS7JTT5ZHsHSzYiFPm1leZck7Mc8T4W"
You can switch a connector to an IdP in your environment (e.g., LDAP, GitHub). Here is an example connector configuration with Okta:
global:
  auth:
    oidcIssuerUrl: https://<LLMariner endpoint URL>/v1/dex

dex-server:
  oauth2:
    passwordConnector:
      enable: false
    responseTypes:
    - code
  connectors:
  - type: oidc
    id: okta
    name: okta
    config:
      issuer: <Okta issuer URL>
      clientID: <Client ID of an Okta application>
      clientSecret: <Client secret of an Okta application>
      redirectURI: https://<LLMariner endpoint URL>/v1/dex/callback
      insecureSkipEmailVerified: true
  enablePasswordDb: false
  staticPassword:
    enable: false
Please refer to the Dex documentations for more details.
The Helm chart for Dex creates an ingress so that HTTP requests to v1/dex are routed to Dex. This endpoint URL works as the OIDC issuer URL that CLI and backend servers use.
10 - Access Control with Organizations and Projects
Overview
Basic Concepts
LLMariner provides access control with two concepts: Organizations and Projects. The basic concept follows OpenAI API.
You can define one or more than one organization. In each organization, you can define one or more than one project. For example, you can create an organization for each team in your company, and each team can create individual projects based on their needs.
A project controls the visibility of resources such as models, fine-tuning jobs. For example, a model that is generated by a fine-tuned job in project P is only visible from project members in P.
A project is also associated with a Kubernetes namespace. Fine-tuning jobs for project P run in the Kubernetes namespace associated with P (and quota management is applied).
Roles
Each user has an organization role and a project role, and these roles control resources that a user can access and actions that a user can take.
An organization role is either owner or reader. A project role is either owner or member. If you want to allow a user to use LLMariner without any organization/project management privilege, you can grant the organization role reader and the project role member. If you want to allow a user to manage the project, you can grant the project role owner.
Here is an diagram shows an example role assignment.

The following summarizes how these role implements the access control:
- A user can access resources in project
Pin organizationOif the user is amemberofP,ownerofP, orownerofO. - A user can manage project
P(e.g., add a new member) in organizationOif the user is anownerofPorownerofO. - A user can manage organization
O(e.g., add a new member) if the user is anownerofO. - A user can create a new organization if the user is an
ownerof the initial organization that is created by default.
Please note that a user who has the reader organization role cannot access resources in the organization unless the user is added to a project in the organization.
Creating Organizations and Projects
You can use CLI llma to create a new organization and a project.
Creating a new Organization
You can run the following command to create a new organization.
llma admin organizations create <organization title>
Note
You can also typellm auth orgs instead of llm auth organizations.You can confirm that the new organization is created by running:
llma admin organizations list
Then you can add a user member to the organization.
llma admin organizations add-member <organization title> --email <email-address of the member> --role <role>
The role can be either owner or reader.
You can confirm organization members by running:
llma admin organizations list-members <organization title>
Creating a new Project
You can take a similar flow to create a new project. To create a new project, run:
llma admin projects create --title <project title> --organization-title <organization title>
To confirm the project is created, run:
llma admin projects list
Then you can add a user member to the project.
llma admin projects add-member <project title> --email <email-address of the member> --role <role>
The role can be either owner or member.
You can confirm project members by running:
llma admin projects list-members --title <project title> --organization-title <organization title>
If you want to manage a project in a different organization, you can pass --organization-title <title> in each command. Otherwise, the organization in the current context is used. You can also change the current context by running:
llma context set
Choosing an Organization and a Project
You can use llma context set to set the current context.
llma context set
Then the selected context is applied to CLI commands (e.g., llma models list).
When you create a new API key, the key will be associated with the project in the current context. Suppose that a user runs the following commands:
llma context set # Choose project my-project
llma auth api-keys create my-key
The newly created API key is associated with project my-project.